USER GUIDE V1.2
Smart mido
User guide v1.2
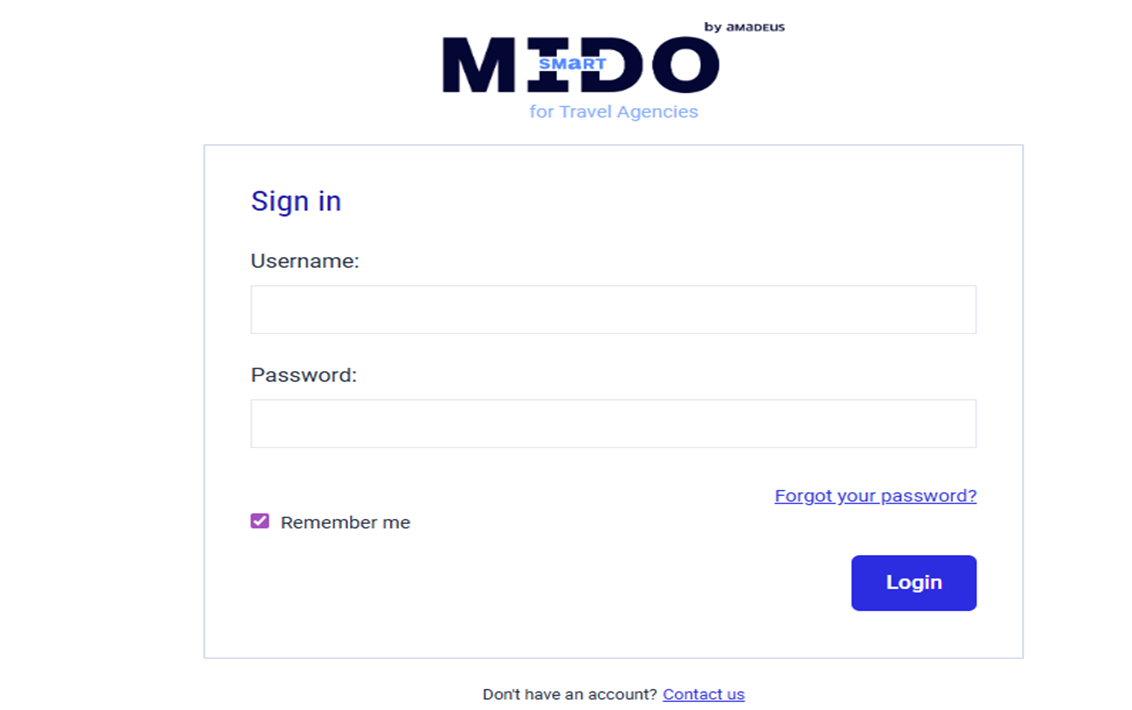
Login
- Open a web browser (such as Chrome, Edge, etc.) and enter https://smartmido.mn or the URL provided by your organization.
- The Login screen will be displayed.
- In the Username field, enter your username.
- In the Password field, enter your password.
- If you check Remember me, your username and password will be saved.
- Click the [Login] button to access the system.
If you have forgotten your password, click “Forgot your password?” to receive instructions for resetting it.
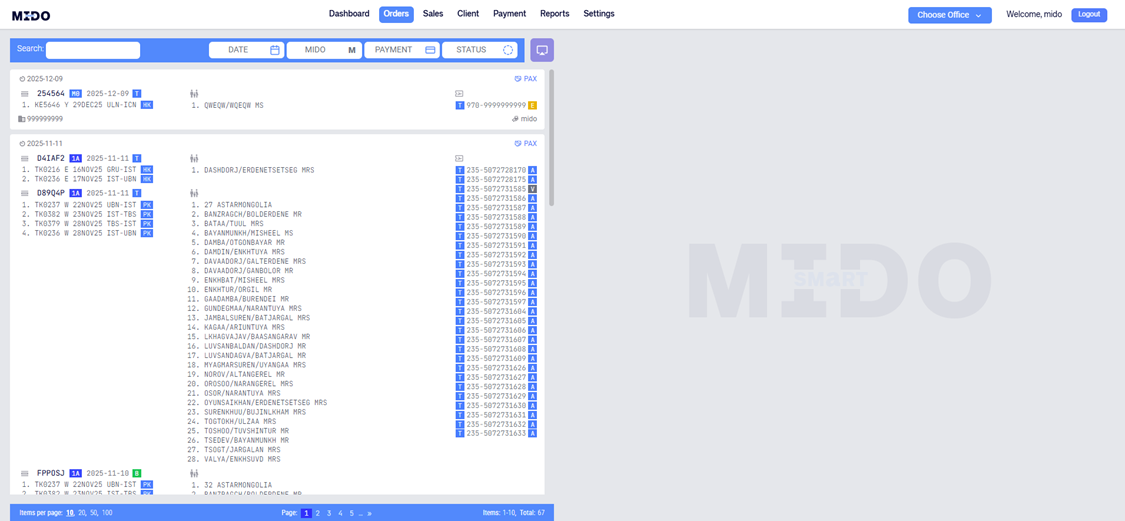
Main order page
This section is the central dashboard for your bookings. Here, you can view registered flight details and passenger information.
WHAT CAN YOU DO?
- Perform searches
- Filter bookings by date
- Filter by agent or staff member
- Categorize by status (active, refund, etc.)
- Check payment status
Create manual bookings
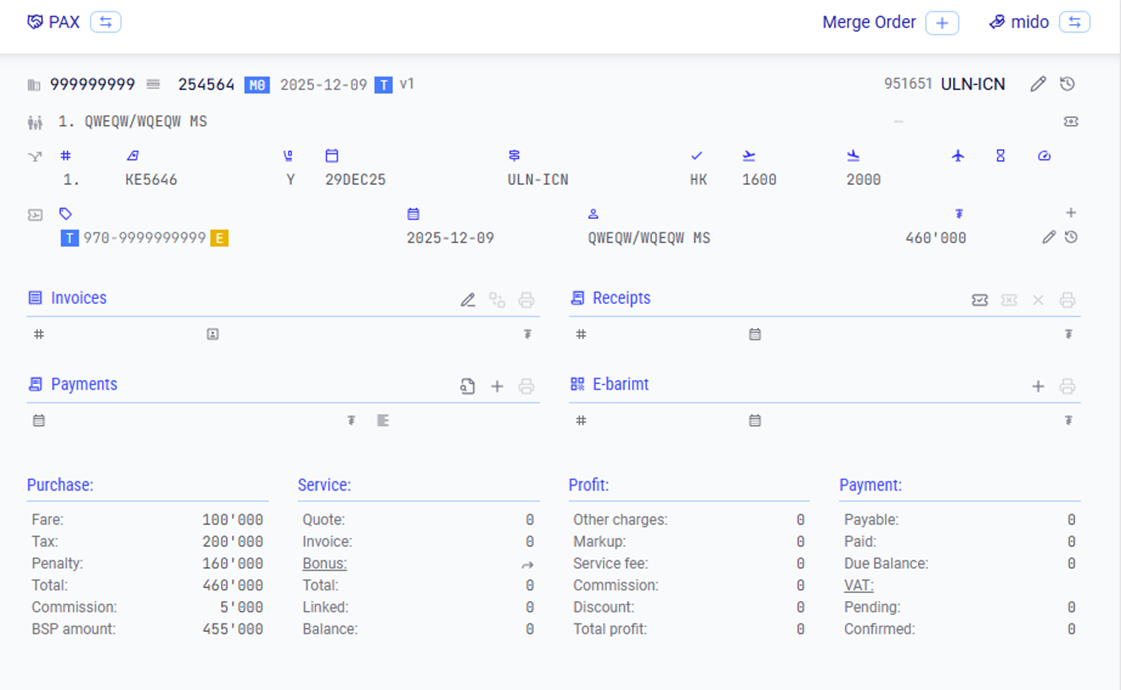
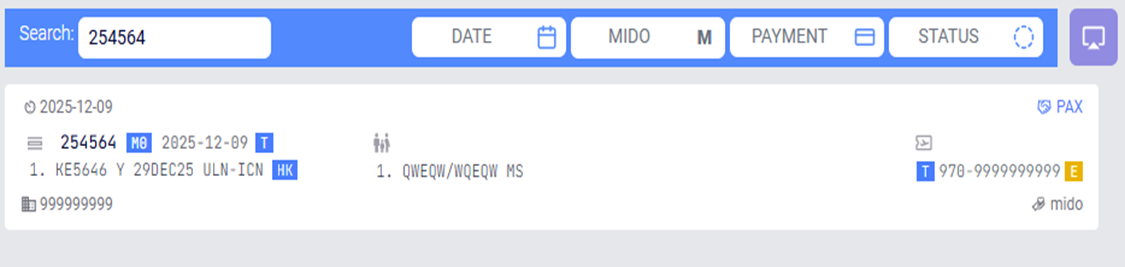
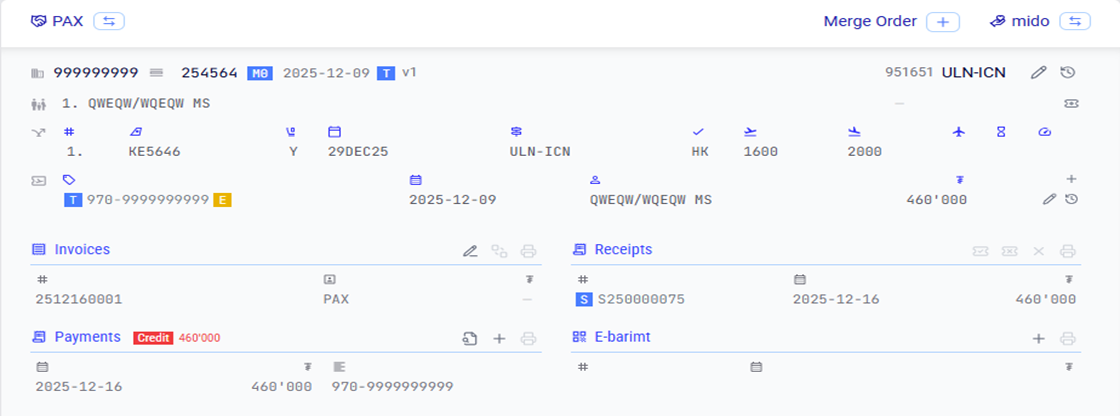
Main order page - Details
When you click on a specific booking, the detailed information for that flight will be displayed.
This includes:
- Passenger name
- Flight number
- Flight route and departure time
- Ticket price information
- Comission, profit, and service fees
Detailed panels
- Invoice
- Receipt
- Payment
- E-barimt
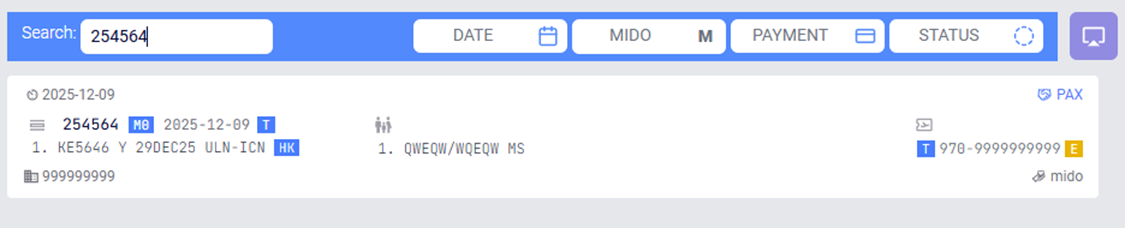
Search
- You can enter your search criteria in the Search field to perform a lookup.
- The system allows searching across all fields, including passenger
name, PNR number, flight route, airline, date, payable amount, and more.
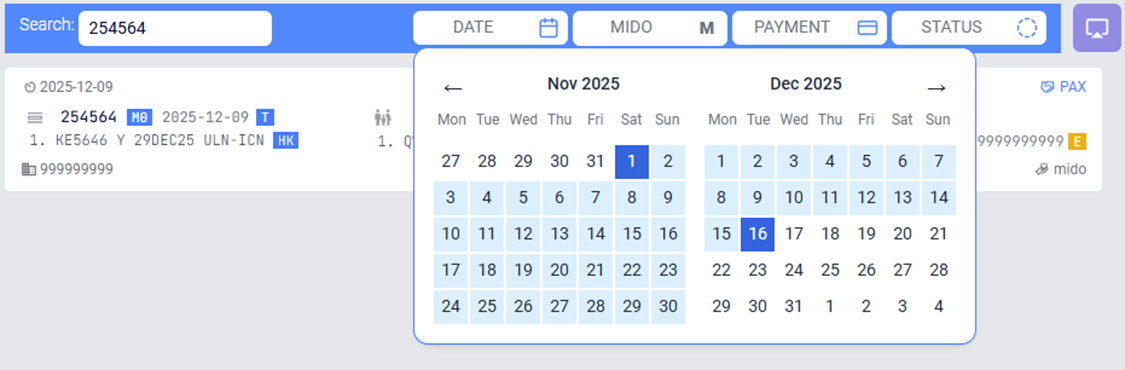
From the Date field located above the booking list, select the start and end dates.
Once selected, only the bookings that fall within the chosen date range will be displayed on the screen.
In the Agent section, you can select names of other agents from the list to view their bookings. When an agent is selected, only the flight-related information for that agent will be visible. Financial details, such as created invoices and payment records, will not be displayed.
In the Payment section, you can categorize and view your bookings by payment status, as follows:All payment – Бүх захиалга
All payment – All bookings
None – Bookings with no receipt created or no payment recorded
Credit – Bookings with an outstanding balance
Paid – Bookings that have been fully paid
Overpaid – Bookings with excess payment, where the amount paid exceeds the ticket price
CREATE NEW BOOKING – MANUAL CREATE
You can manually create a new booking by clicking the Add PNR button.
This section is used to register certain online bookings as well as bookings from other non-cryptic reservation systems.
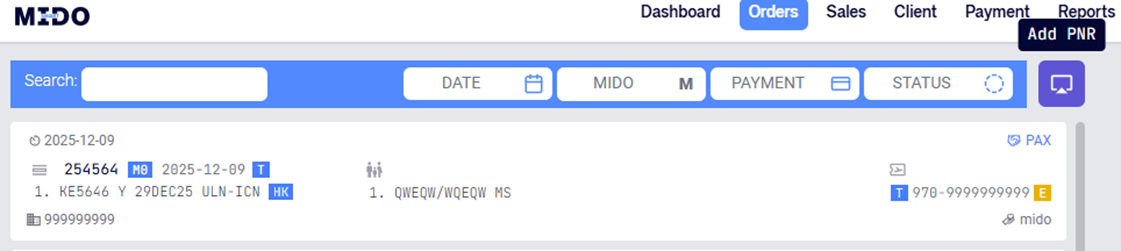
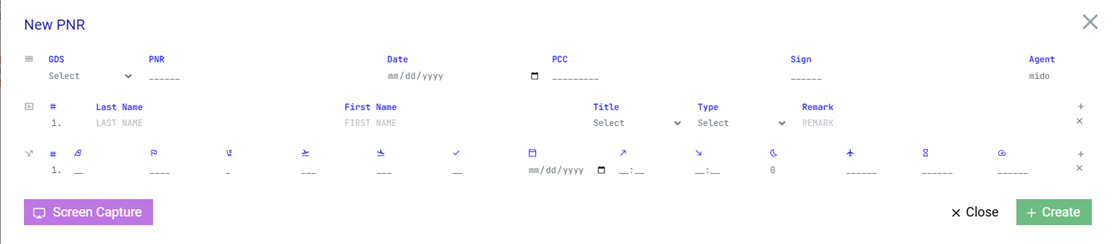
When you click the Add PNR button, the following window will appear.
In this window, select the appropriate GDS from the GDS field to register the booking and proceed with entering the booking details.
GDS
- 1A – Amadeus
- 1S – Sabre
- 1G – Galileo
- AT – Altea
- M0 – Aero Mongolia
- OT – Other (other online bookings)
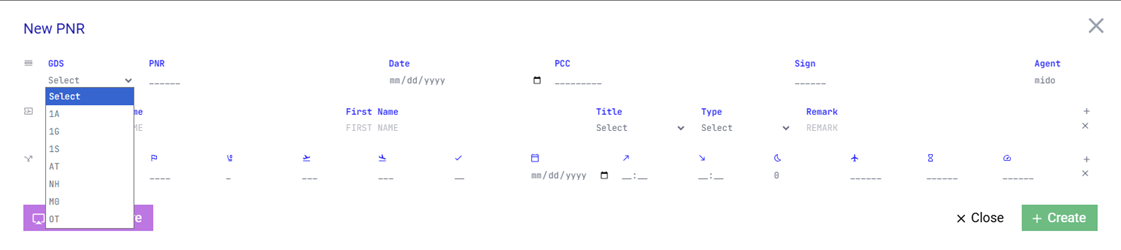
After selecting the appropriate GDS from the GDS field, enter the relevant flight and passenger information in the corresponding fields, then click the CREATE button to create the booking.
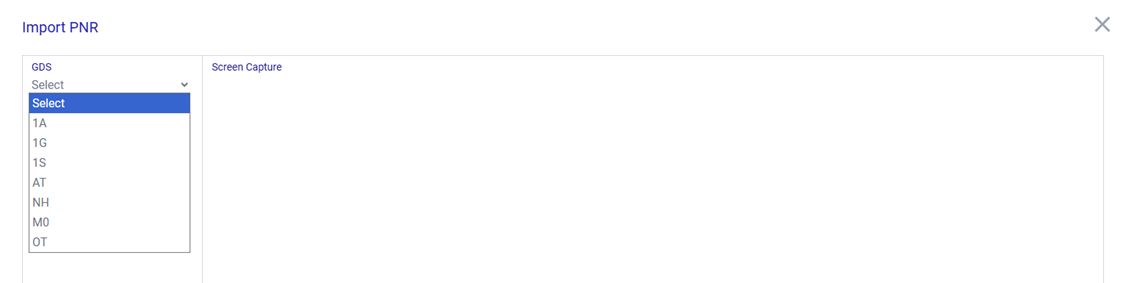
CREATE NEW BOOKING – PARSING
In addition to creating a booking manually, you can also copy the cryptic ticket image from the system where the booking was made and upload it by clicking Screen capture, located at the lower-left corner of the Add PNR window.
Once uploaded, the SmartMido system will automatically recognize the information and register it in the system.
GDS
- 1A – Amadeus
- 1S – Sabre
- 1G – Galileo
- AT – Altea
- M0 – Aero Mongolia
- OT – Other (other online bookings)
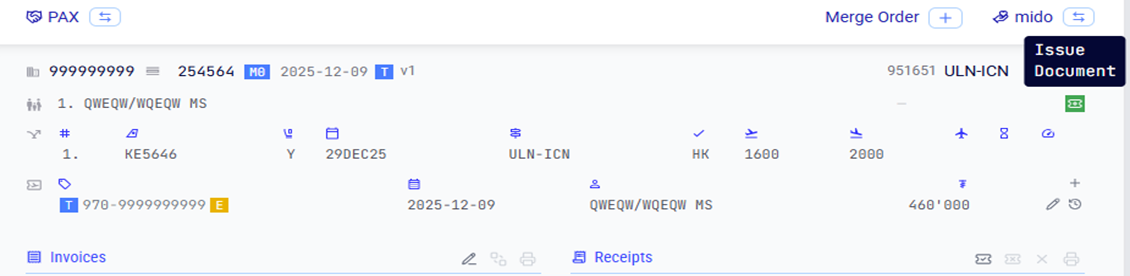
ISSUE TICKET FOR MANUALLY CREATED BOOKINGS
When you click on a manually registered booking, a detailed window will appear.
In this window, click the Issue Document button located on the right side, then enter the complete ticket information for the passenger to issue the ticket.
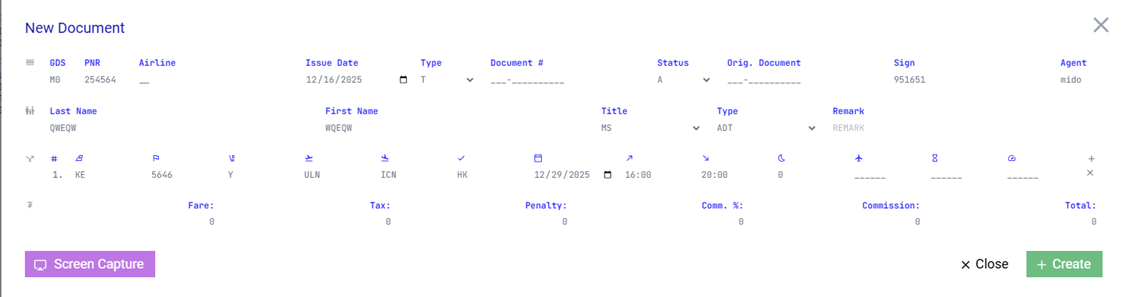
When you click the Issue Document button, the following window will be displayed on the screen.
In this window, you can enter the passenger’s ticket details.Airline code
· Type – Select Active, Refund, or Exchange
· Document – Ticket number
· Fare – Ticket fare
· TAX – Ticket taxes
· Penalty – Penalty fee
· Comm % – Commission percentage
Or
· Commission – Commission amount (fixed value)
After entering all required details, the passenger’s ticket information will be created.
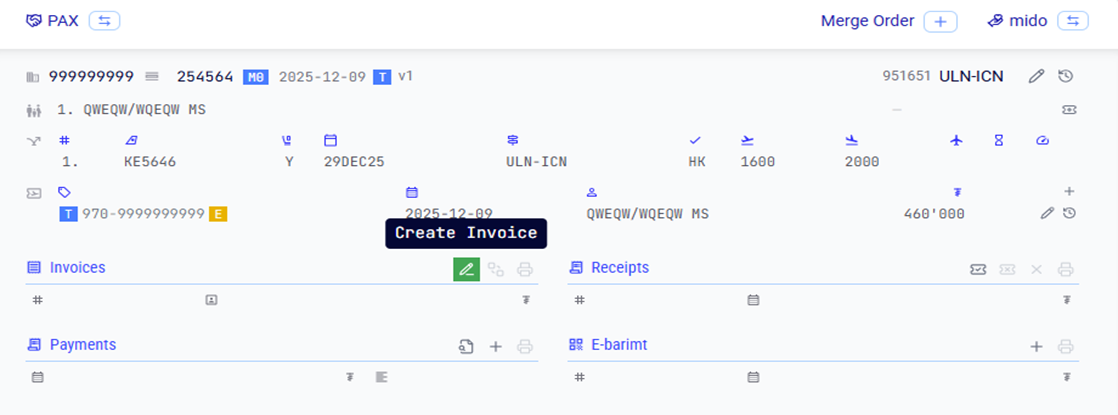
Create invoice
You can create an invoice by selecting a booking on the main booking screen and clicking the Create Invoice button.
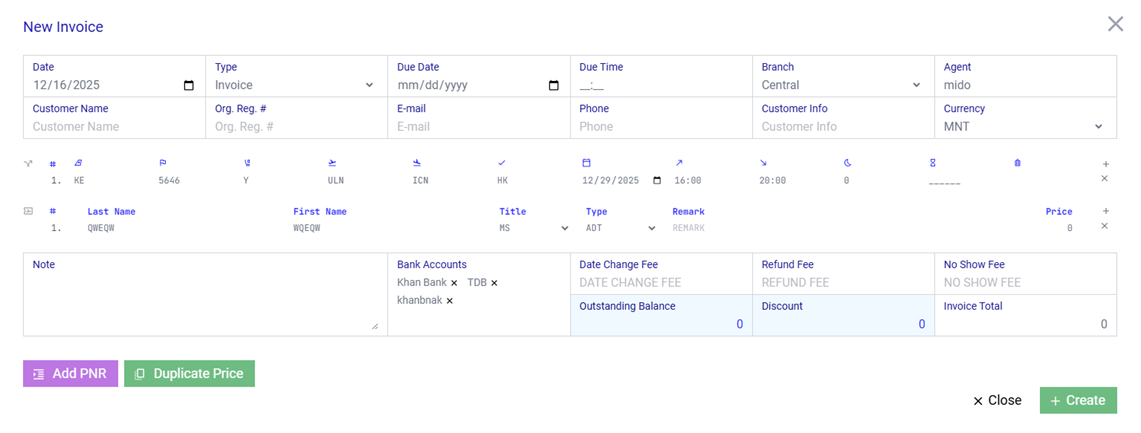
Create Invoice Window
In this window, you can enter the invoice details for the passenger and generate an invoice.
Fields:
- Date – Invoice creation date
- Type – Invoice type: Invoice (billing invoice) or Quote (price quotation)
- Due Date, Due Time – Invoice validity / due period
- Branch – Your branch
- Customer name – Name of the individual or organization to be invoiced
- Customer Reg # – Registration number of the individual or organization
- E-Mail – Customer’s email address
- Phone – Customer’s phone number
- Currency – Currency used for the invoice
Lower section:
- Note – Additional information to be displayed on the invoice
- Bank Accounts – Select from the organization’s registered bank accounts
- Date Change fee, Refund fee, No show fee – Enter applicable penalty fees
- Add PNR – Click this button (located at the lower-left) to combine two or more bookings from the same organization into a single invoice
- Duplicate price – For bookings with multiple passengers, this button copies the first passenger’s pricing information to all other passengers
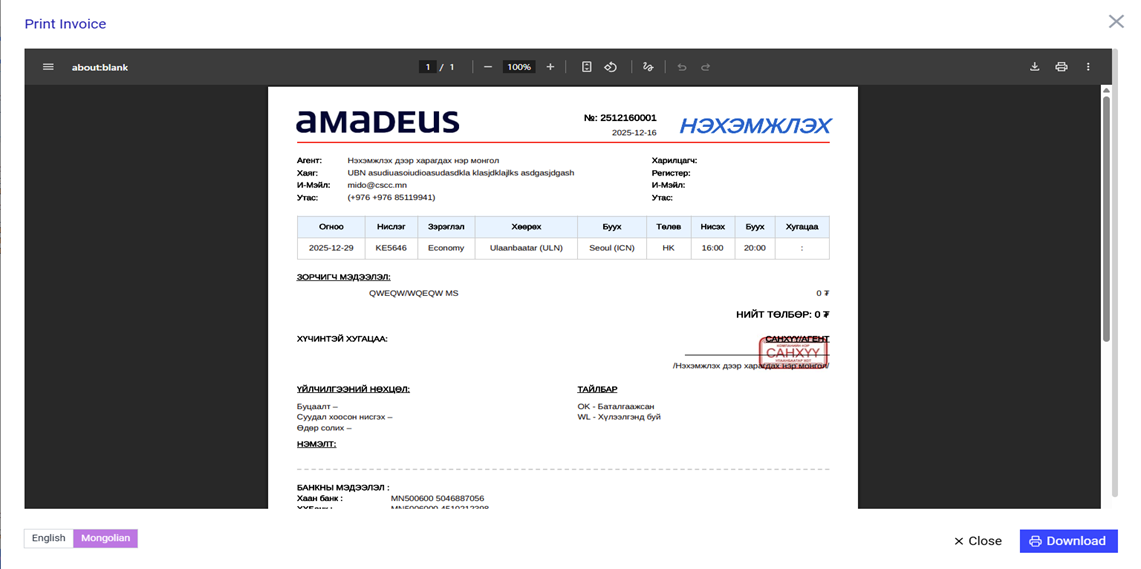
You can download and use the created invoice in the required language from the section located at the lower-left corner of the screen.
Create payment Receipt
You can generate a receipt by selecting a booking on the main booking screen and clicking the Create Receipt button.
By doing so, you send the finance team all relevant information related to the ticket sale, including whether a discount was applied, a markup was added, a bonus was granted, and the commission amount for the ticket.
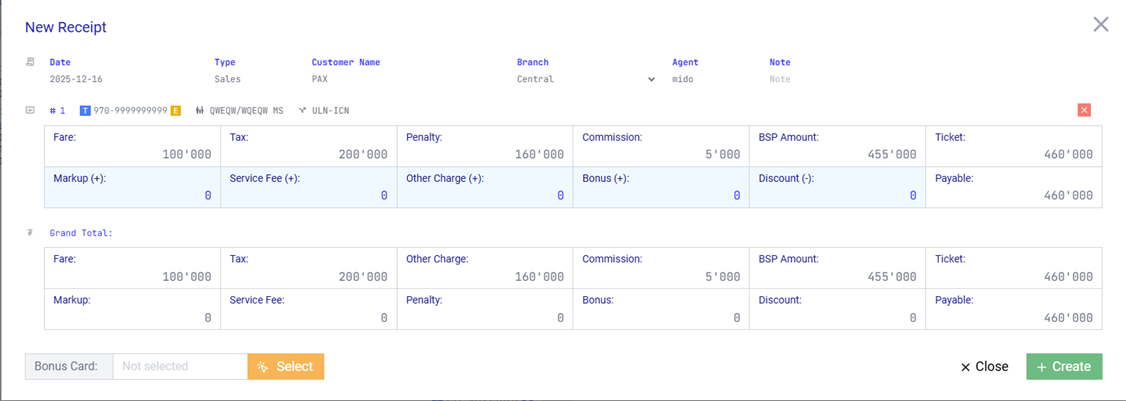
Bonus Card
In this window, you can enter the billing-related details for the passenger and proceed with invoice/receipt processing.
Fields:
- Markup – Additional charge
- Service fee – Service fee
- Other charge – Other charges applied to the passenger (e.g., ATC fee, etc.)
- Bonus – Enter the bonus amount if a bonus is granted to the passenger
- Discount – Enter the discount amount if a discount is applied to the passenger
You can select the passenger’s bonus card by clicking Bonus card – Select located at the lower-left corner of the screen.
The amount entered in the Bonus field will be automatically calculated and credited to the selected bonus card.
Link payment – add statement
You can link a payment by selecting a booking on the main booking screen and clicking the Add Statement button.
After creating a receipt, the Payments field for the booking will display Credit in red, indicating an outstanding balance.
By clicking Add Statement, you can link the passenger’s payment record from the bank statement and finalize the booking.
Bonus Card
In this window, you can enter the invoicing details related to the passenger and proceed with creating the invoice.
Fields:
- Markup – Additional charge
- Service fee – Service fee
- Other charge – Other charges applied to the passenger (e.g., ATC fee, etc.)
- Bonus – Enter this if a bonus is granted to the passenger
- Discount – Enter this if a discount is applied to the passenger
You can select the passenger’s bonus card by clicking Bonus card – Select located at the lower-left corner of the screen.
The amount entered in the Bonus field will be automatically calculated and credited to the selected bonus card.
SALES (SALES INFORMATION)
By selecting the Sales menu, you can access the following information:
- Total sales
- Profit
- Commission
- Detailed information for each passenger
Using the View Data button, you can change the date range and generate reports for the selected period.
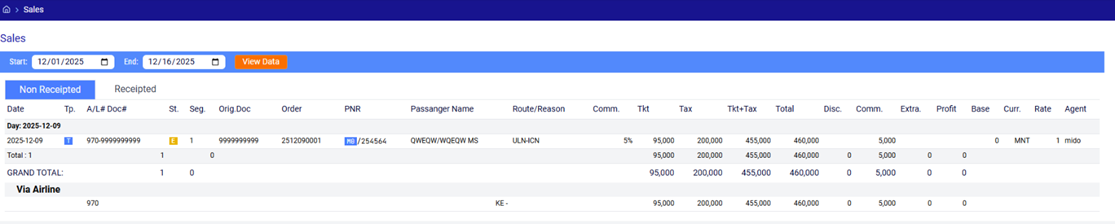
This page consists of two sections:
- Non Receipted – Bookings that have been registered but do not yet have a receipt or payment information
- Receipted – Bookings for which the process is complete and payment information has been created
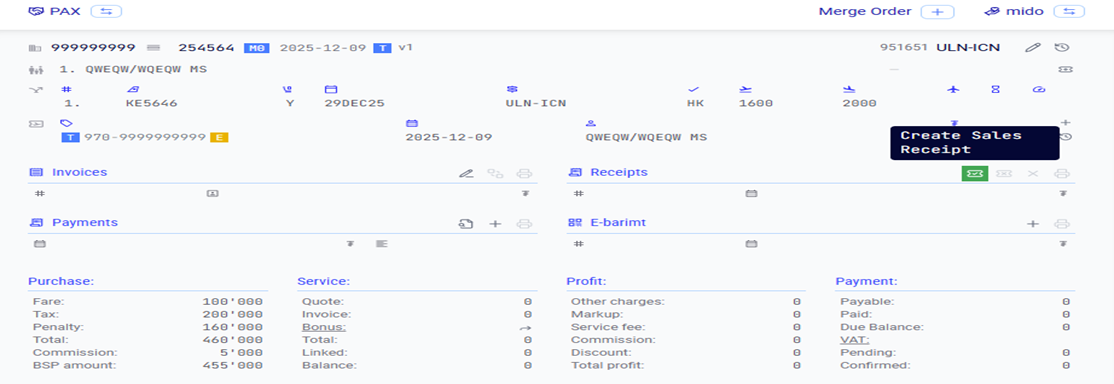
If a receipt or payment information has not been entered, you can select the relevant booking under Orders and click the Create Sales Receipt button to generate a receipt.
CLIENT – CUSTOMER INFORMATION
By selecting the Client menu, you can view and manage the following information:
- Customer – Customer information
- Passenger – One-time purchaser
- Bonus Card – Bonus card information
Across these three sections, you can perform the following actions:
- Read – View information
- Create – Create new records
- Update – Update existing records
- Delete – Delete records

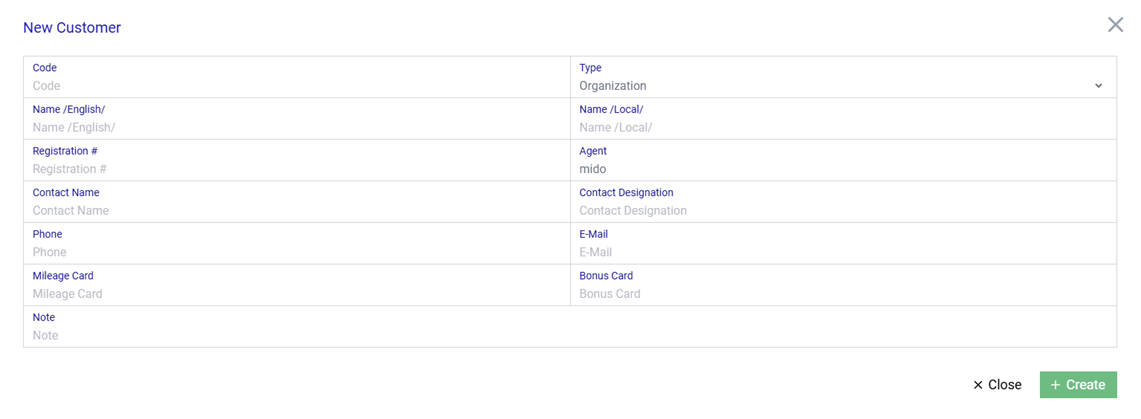
CLIENT – CUSTOMER
CLIENT – PASSENGER
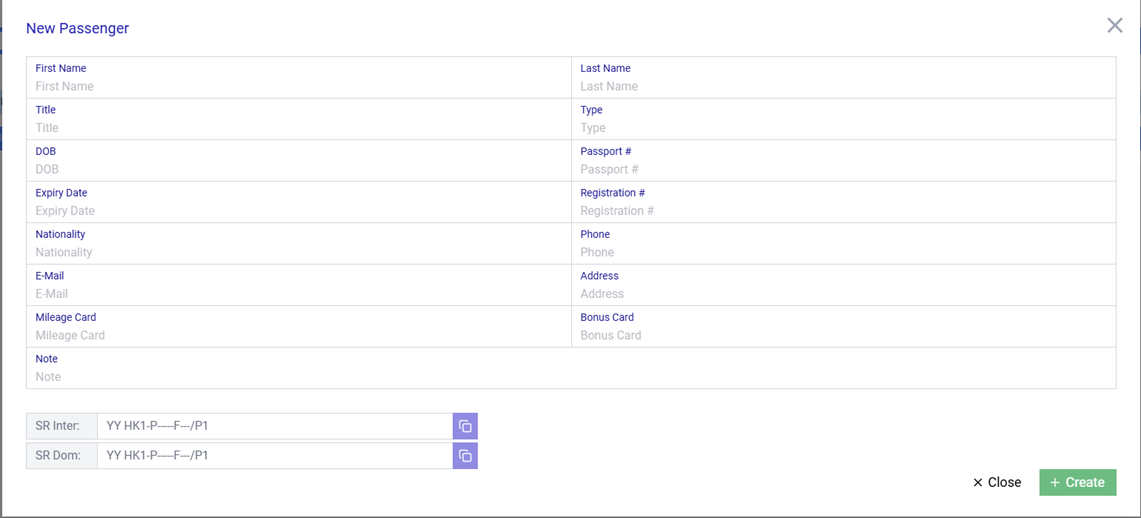
In this section, once you fully enter and save the customer information, SR commands will be automatically generated and displayed at the lower-left corner of the screen, allowing you to copy and use them directly in the Amadeus Selling Platform.
These SR commands include:
- SR Inter – Used directly for international bookings
- SR Dom – Used directly for domestic bookings
CLIENT – BONUS CARD

In this section, you can create and manage the customer’s bonus card.
SmartMido is an integrated platform designed to manage organizational operations intelligently, quickly, and efficiently. The system supports data-driven decision-making, reduces manual work, and enables users to access all critical information from a single, unified interface.
This user guide aims to clearly explain the core features of the SmartMido system and to guide users in using the system correctly and effectively.
Commenting is not enabled on this course.